Basic Troubleshooting - Oscilloscope basics
As we become more confident in our troubleshooting, we find that we want to look at more complex signals and this is where the multimeter and logic probes are out of their depth, despite their usefulness.
This is where our oscilloscope comes in, because it's like having a video camera looking at your signals in real time. Unlike Logic Analysers, which record and let you go back and watch, the oscilloscope can let you watch live, and snapshot events as they happen. Logic Analysers only record changes in logic levels too, so things like frequency are not so easy to measure. As you'll see, the oscilloscope can do so much more.
Imagine your multimeter is a Fiat 500, well your oscilloscope is a Ferrari!
Modern digital storage oscilloscopes can even allow for recording of sequences too, and you can walk up and down the timelines to get a feel of what is what.
This guide cannot teach you the ins and outs of all oscilloscopes, because they are too numerous and different. You'd need to learn how to use whatever 'scope you buy, but it does seek to show you some of the basic things one can capture.
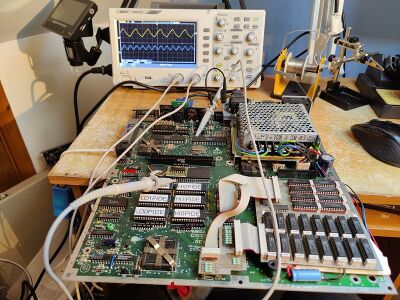
Take our patient here, an Atari Mega ST:
Behind it we see an inexpensive (Under £150) 2 channel oscilloscope, connected to the 16Mhz clock pin of the Shifter, and the 8Mhz clock of the 68000 CPU.
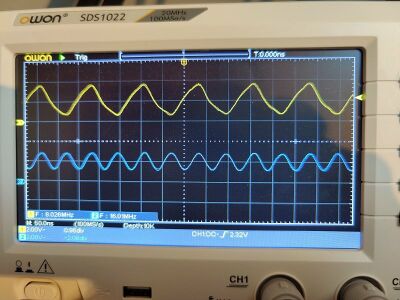
Looking more closely at the 'scope, we see that it is actually measuring the frequency of both (Yellow is CH1, Blue is CH2) and showing the result on screen, and also showing us the difference in the waveform at both locations.
Additionally what we see on screen is shown live as it happens. In fact frequency is not the only thing that we can measure with our scope, we can measure pretty much everything we can with a multimeter, plus we can measure peaks, averages, means and so much more.
For example, the following picture shows the probes now connected to the /RESET and D4 pins of our 68000 CPU. We know this because we've looked at our data sheets: Datasheets
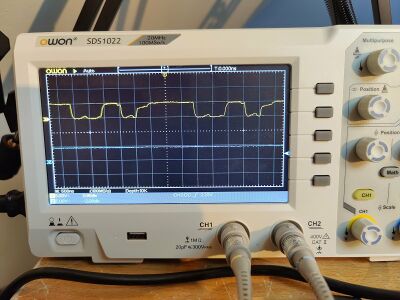
But this is a static picture, and in reality, what we see on the scope is actually this:
And it is difficult to see what is happening. But with a 'scope we can see better what is happening by setting a trigger. Here the trigger is set to fire and stop the trace briefly:
This is better, since we see what happens when the reset button is pressed, albeit briefly. But the 'scope can take it one step further and freeze the capture under even more specific circumstances.
Here we can see a trigger set to capture the /RESET line state change, as it rises from its active low state (0v) to its inactive high state (5v). Not only that, but it will stop the trace in screen for us so we can check it's doing what we expect.
As our reset button is released, we capture the state change of the /RESET pin from active to inactive, but we also see a pulse on the data line indicating data is being read by the CPU, with a level of 5v being a 1 and 0v being a 0.
Not only that, but because the 'scope shows time from left to right, we also see how long it took for the levels to change on each pin, and because the 'scope is recording this for us, we can scroll left and right and see what happened before and after!
As you can see, the oscilloscope or 'scope is an incredibly powerful tool, and the examples above only scratch the surface of just what a 'scope is capable of.
As somebody who wants to fix retro computers, I've come to the conclusion that a 'scope is indispensable, however if you only want to fix one machine, you probably won't want to spend £150 or more on one tool.
My advice here is look at your long term plans, and if you intend to be looking at and fixing machines regularly, then a scope is good value, but be aware that they do have limitations, such as frequency. Whilst the scope in the examples is a good unit, it is limited to being able to measure a maximum frequency of 20Mhz. This is fine for many retro machines, and certainly the ST has most clocks lower than that. BUT it does have 32Mhz in places, and with a 20Mhz limitation, the frequency cannot be measured. That said, you can display a 16Mhz frequency and measure it and compare it to the 32Mhz wave and see if it looks 'ok'.
Finally, I would recommend a dedicated scope if you intend to buy one. There are USB only devices that connect to a PC and use software to drive the device, and they are a 3rd of the price, but they have poor interfaces and are quite hard to operate using a mouse on a PC screen.
Good luck with all your troubleshooting!


