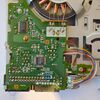
Replace internal 720k DD Floppy Drive with 1.44MB HD Floppy Drive
Jump to navigation
Jump to search
In theory most (not all) PC 1.44MB floppy drives can be used as a replacement for the Atari ST internal drive.
To maintain standard compatibility (read and write standard 720k disks) the following must be observed:
- Firstly, the replacement drive must have the option to be able to change the 'Drive Select' preference from DS1 to DS0 (In many cases this involves moving a jumper or re-soldering the option on the floppy drives circuit board).
- Secondly, the main ribbon cable that connects to the floppy drive also needs to be twisted 180 and attached upside-down to its regular position (You may even need to replace the ribbon cable as the standard one is very short and becomes even shorter with the twist, caution as the cable is often glued to the board).
- Modification to the upper casing of the Atari ST's case may be necessary to accommodate the square floppy eject button on PC floppy drives.
To have enhanced compatibility (read and write standard 720k and high density 1.44MB disks) you will also need the following:
- Upgrade to TOS version 2.06
- Install a floppy disk controller mod chip board to enable automatic switching between 720k and 1.44MB disks.
DS0 Compatible drives
| Manufacturer | Model Number | Mod type | Image before | Image after | Instructions | Reference Link | Machine tested | Submitted by |
|---|---|---|---|---|---|---|---|---|
| Mitsubishi | MF355F-250MG | Jumper | Move jumper on DS1 from C2D2 to DSO on C1D1. For Falcon also keep jumpers on E3F3 and E1F1 | [1] | Falcon | Catmando | ||
| Mitsumi | D353M3D-5000 | Solder | 
|
Cut the trace coming from pin 12 on the floppy connection, then scrape the coating further along the trace to reveal the track beneath. Solder a wire from the exposed track to pin 10 on the floppy connector. | [2] | Catmando | ||
| Mitsumi | D359M3 | Solder | 
|
Cut the trace coming from pin 12 on the floppy connection, then scrape the coating further along the trace to reveal the track beneath. Solder a wire from the exposed track to pin 10 on the floppy connector. | [3] | Falcon | Catmando | |
| Mitsumi | D359M3D | Solder | 
|
Cut the trace coming from pin 12 on the floppy connection, then scrape the coating further along the trace to reveal the track beneath. Solder a wire from the exposed track to pin 10 on the floppy connector. | [4] | Catmando | ||
| Samsung | SFD-321B | Solder | 
|
Remove the lower casing and unsolder the bridge on the DS1 pad, then solder a bridge on the DS0 pad | Falcon | Catmando |
Magazine References
- See ST Format, issue 32, p 121.
External Links
- SONY MPF920 1.44 DRIVE MOD - Mod by Exxos
- Floppy disk controller chip mod - Mod by Exxos
- List of compatible floppy disk drives - Atari forum thread
- Atari Floppy drive info - Differences between Atari and PC floppy drive document