TOS 2.06 keyboard shortcuts
TOS 2.06 allows for several keyboard shortcuts.
There are shortcuts for most of the window menu functions (go to the "File", "View" or "Options" menus and you'll see a letter on the right hand side of any of those drop-down menus, indicating the shortcut letter, which can be changed if you wish, by going to "Desktop Configuration" in the "Options" menu).

Some of the shortcuts are shown when you press the <HELP> key, while others are more or less undocumented, which is why I'll try to list and explain them here...
|
|
|


In the examples below e.g. <Control><X> means: "press and keep holding down the Control key while pressing "X".
<Alternate> and double-click a folder means "press and keep holding down the the Alternate key while double-clicking a folder ".
While booting (starting up)
The following shortcuts can be used right after you've switched the computer on, or after a cold or warm reboot.
- Press any key (except <Shift>, <Alternate>, <Control> or <Caps-Lock>) to skip the memory test.
(if you have a hard disk, wait a few seconds before you do this to allow the drive to spin-up and get ready). - If your machine has a hard disk:
- Press (and keep holding) <Control> while the computer is booting.
(It's important that you press (and hold) this key down as soon as the computer is turned on/has been reset).
This will boot the machine without any ACCessories, AUTO programs, the "NEWDESK.INF", the "DESKICON.RSC" file or anything else. It will however read the hard disk driver, making the hard disk available.
(Useful if one of your AUTO programs or ACCessories keeps crashing the machine while you start up, making it impossible to disable them).
You will most likely not see all your hard drive partitions, so go to the "Options" menu and select "Install Devices" as this will mount all available drives/partitions to your desktop. - Press (and keep holding) <Alternate> while the computer is booting.
(It's important that you press (and hold) this key down as soon as the computer is turned on/has been reset).
This will boot the machine without any ACCessories, AUTO programs, the "NEWDESK.INF", the "DESKICON.RSC" file or anything else. It will NOT read the hard disk driver file either so you won't be able to access your hard disk.
(Useful in situations where your hard disk is missing its driver software or it's been messed up somehow. You will need to (manually) run the hard disk driver software from a floppy disk to be able to access the hard disk, then install the driver on the hard disk itself). - Booting from a floppy disk on a machine with a hard disk:
The procedure for this is dependant on your hard disk driver software. If you're using Atari's own AHDI the procedure is as explained below, if you're using HDdriver you press the drive letter (i.e. <A> in this case) to boot from that drive. Other hard disk drivers (such as CBHD) might have other ways of booting from a floppy.
Here's what to do if AHDI has been installed on your hard disk (the same key-press usually works with other hard disk drivers as well):
- Be sure the floppy disk is inserted in the drive (obviously a floppy disk with AUTO programs and/or ACCessories, a "NEWDESK.INF", a "DESKICON.RSC" file etc. which you want to load into the computer when you turn it on/reboot).
- Press (and keep holding) <Alternate> while the computer is booting (you can let go when you see/hear the floppy disk drive start working, loading the software from the floppy disk).
(It's important that you press (and hold) this key down as soon as the computer is turned on/has been reset).
This will boot the AUTO programs, ACCessories etc. from your floppy disk and leave the hard disk alone.
(Useful in situations where your hard disk is missing its driver software or it's been messed up somehow. If you have a boot floppy disk containing a working hard disk driver in the AUTO folder, the driver will load from the floppy, then mount the hard disk making it available from the desktop. From then on you can continue installing the hard disk driver on the hard disk itself).
- Notes about booting from a floppy disk on a hard disk drive system
Depending on the presence of a hard disk driver or not on the floppy disk, several things can happen (a hard disk driver in the form of "AHDI.PRG", "HDDRIVER.PRG etc. can be placed in the AUTO folder or elsewhere on the floppy disk -you should not try to install the hard disk driver on the floppy disk the same way as you would do on a hard disk. Simply placing the hard disk driver programs on the floppy disk will do)...
- If the AUTO folder (on the floppy disk) contains a hard disk driver:
- Press (and keep holding) <Alternate> while the computer is booting (you can let go when you see/hear the floppy disk drive start working, loading the software from the floppy disk).
(It's important that you press (and hold) this key down as soon as the computer is turned on/has been reset).- This will load the following from the floppy disk:
- All AUTO programs (including the hard disk driver)
- ..and the following from the hard disk:
- All ACCessories (if present)
- The "NEWDESK.INF" file (if present)
- The "DESKICON.RSC" file (if present)
- This will load the following from the floppy disk:
- Press (and keep holding) <Alternate> while the computer is booting (you can let go when you see/hear the floppy disk drive start working, loading the software from the floppy disk).
- If you save the desktop, the "NEWDESK.INF" file will be saved on to the hard disk and not the floppy disk!
A good rule to keep in mind is that this file will be saved to whichever drive it was read from when booting (starting up).
- If the AUTO folder (on the floppy disk) does not contain a hard disk driver:
- Press (and keep holding) <Alternate> while the computer is booting (you can let go when you see/hear the floppy disk drive start working, loading the software from the floppy disk).
(It's important that you press (and hold) this key down as soon as the computer is turned on/has been reset).
- This will load the following from the floppy disk:
- All AUTO programs (if present)
- All ACCessories (if present)
- The "NEWDESK.INF" file (if present)
- The "DESKICON.RSC" file (if present)
- ..and the following from the hard disk:
- Nothing (no hard disk driver has been used, so the hard disk drive can't be accessed).
- Nothing (no hard disk driver has been used, so the hard disk drive can't be accessed).
- This will load the following from the floppy disk:
- If you save the desktop, the "NEWDESK.INF" file will be saved on to the floppy disk.
A good rule to keep in mind is that this file will be saved to whichever drive it was read from when booting (starting up). - At this stage you can't access the hard disk, but if you run a hard disk driver from your floppy disk (present anywhere on the floppy disk except the AUTO folder, meaning you have to double-click that program) ...the hard disk will "mount" and be accessible from the desktop as soon as you add its icon/icons by installing devices.
- No hard disk drive icons on the desktop?
Whenever you boot from a floppy disk which has a hard disk driver in its AUTO folder, the hard disk will mount, and the "NEWDESK.INF" file (if present) will be read from the hard disk. It's then quite likely that your desktop already has icons for all your drives. - But if you've mounted the hard disk by running the hard disk driver manually from the floppy disk (by double clicking e.g. "AHDI.PRG" or "HDDRIVER.PRG"), or there's no "NEWDESK.INF" file present on your hard disk which you could otherwise manually read, you won't have any hard disk drive icons available on your desktop.
- An exception to this rule is that a drive "C" icon is automatically added to the desktop if a "NEWDESK.INF" file is unavailable from the hard disk and the hard disk driver has been run from the AUTO folder of the floppy disk.
- ...still, this only accounts for drive C (which is usually the boot drive on a hard disk system). So what if your hard disk has several partitions (C, D, E, F etc.) or you even have several physical hard drives (or other storage devices such as ZIP drives, CD-ROM drives etc.)?
- Run the hard disk driver from the floppy disk (either by having it placed in the AUTO folder, or manually). This will make the hard disk (and other storage units if present) "mounted" and available.
- Go to the "Options" menu and select "Install Devices". This will add icons for all of your drives.
- At this stage you may also want to remove icons belonging to certain drives you won't be using (e.g. floppy disk drive "B")
- You can also change the name or icon of any current drives on your desktop.
- Don't forget to save the desktop after you're done.
- Press (and keep holding) <Alternate> while the computer is booting (you can let go when you see/hear the floppy disk drive start working, loading the software from the floppy disk).
- Be sure the floppy disk is inserted in the drive (obviously a floppy disk with AUTO programs and/or ACCessories, a "NEWDESK.INF", a "DESKICON.RSC" file etc. which you want to load into the computer when you turn it on/reboot).
- Press (and keep holding) <Control> while the computer is booting.
- If your machine only has a floppy disk drive:
- Press (and keep holding) <Control> while the computer is booting.
(It's important that you press (and hold) this key down as soon as the computer is turned on/has been reset).
- This will skip booting from the floppy disk drive and (after a few seconds) present you with the TOS 2.06 desktop.
(Useful if you have a disk inserted in the drive, but don't want to load its AUTO programs, ACCessories, "NEWDESK.INF" or "DESKICON.RSC" files. Booting on a floppy-only system without a disk inserted in the drive takes a lot longer than with a disk inserted in the drive).
- Press (and keep holding) <Control> while the computer is booting.
- <Alternate> and <drive letter>: opens a new window with the contents of that drive
(e.g. <Alternate><D> opens up a new window with the contents of drive D). - <Control> and <drive letter>: replaces the currently active window with the contents of that drive
(e.g. <Control><F> replaces the window with the contents of drive F).
If there are no open windows on the desktop this shortcut will open a new window with the contents of the drive letter you've entered. - <Alternate> and <double-click a folder>: the contents of the folder will open into a new window.
- Hold down (and keep holding) <Shift> while single-clicking files/folders to select several items at once (e.g. copying/moving/deleting several files at once).
You can also use the mouse to scroll up/down the window if necessary, without losing the selected files as long as you keep holding the <Shift> key.
Single-click once again on a file while still holding <Shift> to de-select only that file. - Hold down <Control> while copying files: the files will be moved (the originals will be deleted.)
- Hold down <Alternate> while copying files: you can rename the new copies of the files.
- Hold down <Alternate><Control> while copying files: this both moves the files and lets you rename them.
- Press <Esc> to refresh (update) the current active window.
Useful if you've got a window open showing the contents of a floppy disk which you've exchanged with another disk in the meantime (pressing <Esc> will show the contents of that new disk). - Press (and keep holding) <Undo> to stop any file-operation (copying, deleting or moving files).


Mouse replacement shortcuts
Don't have a mouse? Not a permanent solution, but...
- <Alternate><arrow keys> to navigate
(keeping the keys depressed repeats the movements, their speed following the keyboard repeat rate set in the "general" CPX control-panel module. - <Alternate><arrow keys><Shift> to navigate more accurately.
- <Alternate> and <Insert> to select a file/icon/program (single-mouseclick).
- <Alternate> and <Insert> (twice) to open a file/icon/program (double-mouseclick).
- <Alternate> and (keep holding) <Insert> while using <arrow keys> to drag a file/folder/program.
- <Alternate> and (stop holding) <Insert> while using <arrow keys> to drop a file/folder/program.
Shortcuts for rebooting (restarting) the computer
- <Control><Alternate><Delete> will perform a "warm-boot" which is basically the same as pressing the "reset" button on the back of the machine.
- <Control><Alternate><Right-Shift><Delete> will perform a "cold-boot" which is basically the same as turning the power off, then on again. You might need to do this if the computer has suffered from a bad crash where a "warm-boot" (or pressing the reset-button) won't help.
In very severe cases you might even have to actually turn the computer off by using the power-switch, wait 15-30 seconds (allowing all memory to clear), then turn it on again. I have personally experienced several cases where a warm or cold-boot just won't recover properly from a bad crash, but turning it off, waiting several seconds, then on again will.
Shortcuts for printing or viewing files
- Press the > key to print the file/folder contents of the top (active) window.
(This will be a text-listing as explained in the printing tips section. - Press <Alternate><Help>.
This will do a graphic printout of the desktop exactly as you see it (with icons, any open windows etc.).
(Note: some screen-grabber type programs if installed (such as N_Althelp) replace this keyboard shortcut with their own functions, so the screen is instead saved as a picture file). (check out my printing tips for more detailed information about the subject). - When viewing text files...

- <Space> (or left-mouseclick)to move forward one page.
- <D> (or <Control><D>) to move forward half a page.
- <Return> (or <Enter> or <Control><C>) to move forward one line.
- <Undo> (or
or <Control><C> or right-mouseclick) to quit viewing and return to the desktop.

Other shortcuts
- <Alternate><1>: set display to ST low resolution (if available).
- <Alternate><2>: set display to ST medium resolution ( if available).
- <Alternate><3>: set display to ST high resolution ( if available).
- <Alternate><numeric keypad>: get access to ANY character available in the Atari character set, regardless of which language keyboard your computer has.
(e.g. hold <Alternate> while typing 142 on the numeric keypad, then release the <Alternate> key which presents you with the letter ý).
Look up the Atari ASCII character set table for the decimal equivalents of each character. You can use this feature if you want to give desktop icons names with non-English characters, or even within programs such as word-processors and so on. - Most windows with choices have a default option which is highlighted in bold as shown here (the "OK" button):
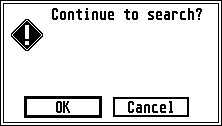
If you press <RETURN> (or <ENTER> in most cases) this option will be selected.
The default option is usually also the "safe" choice, which is good to know if you're in doubt and afraid of messing things up). - When in a text-input window... if you've written something (or there's already text there) which you want removed; instead of pressing <Backspace> you can press <Esc> once to clear that line!
- If there are several text-input lines you can move between them either by using the <Arrow up> and <Arrow down> buttons, or <Tab>. The latter moves forward to the next line.

